Images
Inserting images into documents can be a way to present information more effectively than using only text. You can communicate more clearly by inserting photographs, graphics and screen captures. GIF, JPG, BMP and PNG images are supported.
Here you will learn how to insert images and adjust their properties.
Inserting Images
You can insert images into CrossEditor documents, including images that you have made, photographs, and images found on the internet.
1 | Place the cursor where the image will be inserted and click the () button. |
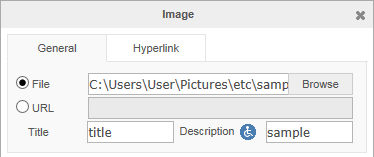
2 | In the panel that appears, click the button. In the dialog box, select the image that you want and click . |
In the panel, the box will automatically be filled in. | |
3 | |
If the Administrator sets the Accessibility options to Level 1 or Level 2, the user must enter text in the Description field. |
You can select a local picture file, and insert a picture into a document by Drag & Drop.
Internet Explorer version 10 or higher, Chrome, Safari, Firefox and Opera support this function.
The image insertion positions depending on browsers are as follows:
Browser | Description | |
IE 10 or higher | Inserted at the final position of the editing area | |
Chrome | Inserted where the caret is located before Drag & Drop | |
Safari | Inserted where the caret is located before Drag & Drop | |
Firefox | Inserted where the image is dragged and dropped in the editing area | |
Opera | Inserted where the caret is located before Drag & Drop | |
Inserting Background Images
1 | Click the () button. |
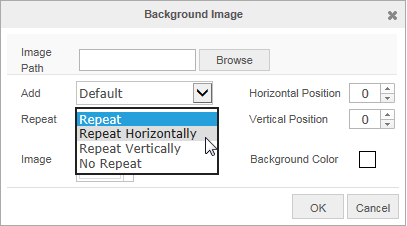
2 | In the panel that appears, click the button. In the dialog box, select the image that you want and click . The box will automatically be filled in. |
3 | Specify whether to add the background picture. |
| |
4 | In the drop-down box, choose whether the image should repeat and how it repeats. |
| |
5 | Specify the , and of the background picture. |
| |
Click the button. The selected image will appear as the background. |


