This document provides how to execute test plans.
To manage test plans, you need a permission such as Project Manager, Create Plan/TC …, TC Execute. For more information, please refer to Global Permissions.
To execute the test plan, the following prerequisites must be satisfied.
You must change the status of test plan to TESTING.
Before run the test, you must add a regression.
To add a regression the test plan must include at least one test case.
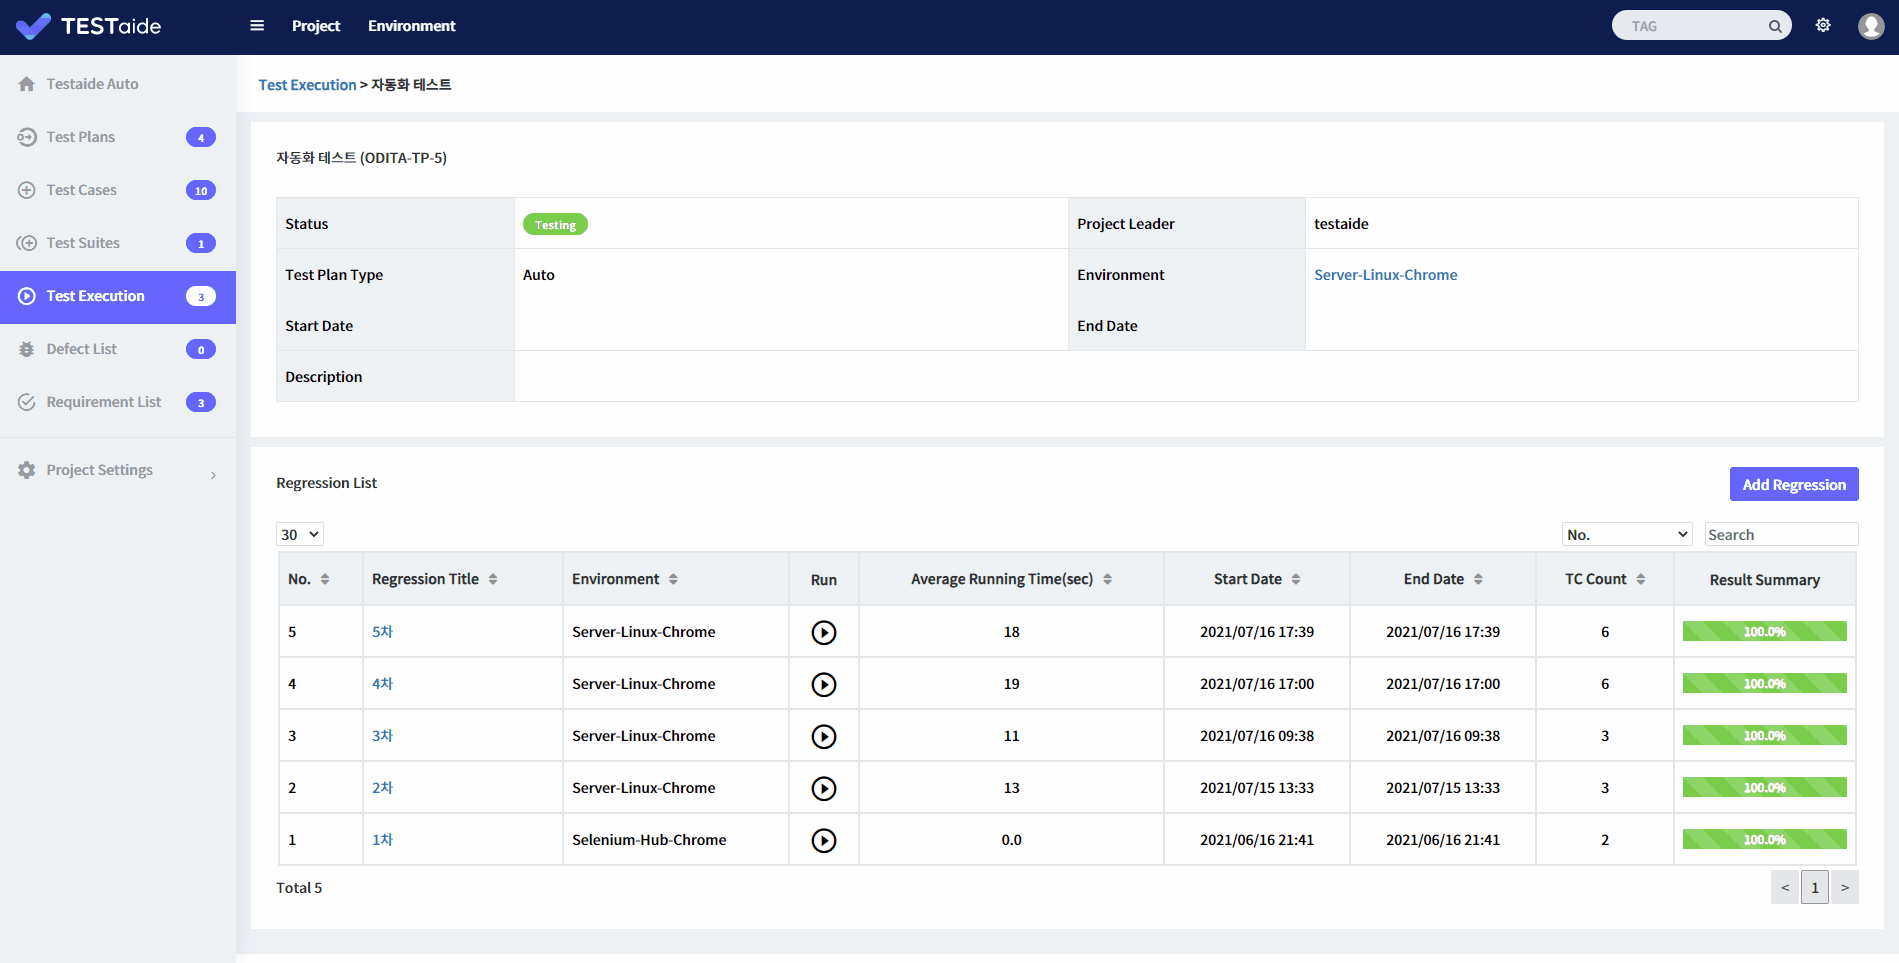
Add Regression
When a regression is created, all test cases within that test plan are targeted for test.
Therefore, test cases that no longer need to be tested must be deleted or new test cases must be added before adding a regression.
To add a regression,
In TESTaide home, select a project that you want to execute.
Select the 'Test Execution' menu on the left sidebar.
In the test execution page, select a test plan that you want to add a regression.
In the regression list panel below, click the ‘Add Regression’ button and enter the following information.
Test Plan Key* : The key of the selected test plan. (Fixed)
Regression Title* : The maximum length is 50 characters.
Environment : Test environment selected when creating the test plan.
Click the ‘Save’ button at the bottom to complete the adding a regression.
Test Execution
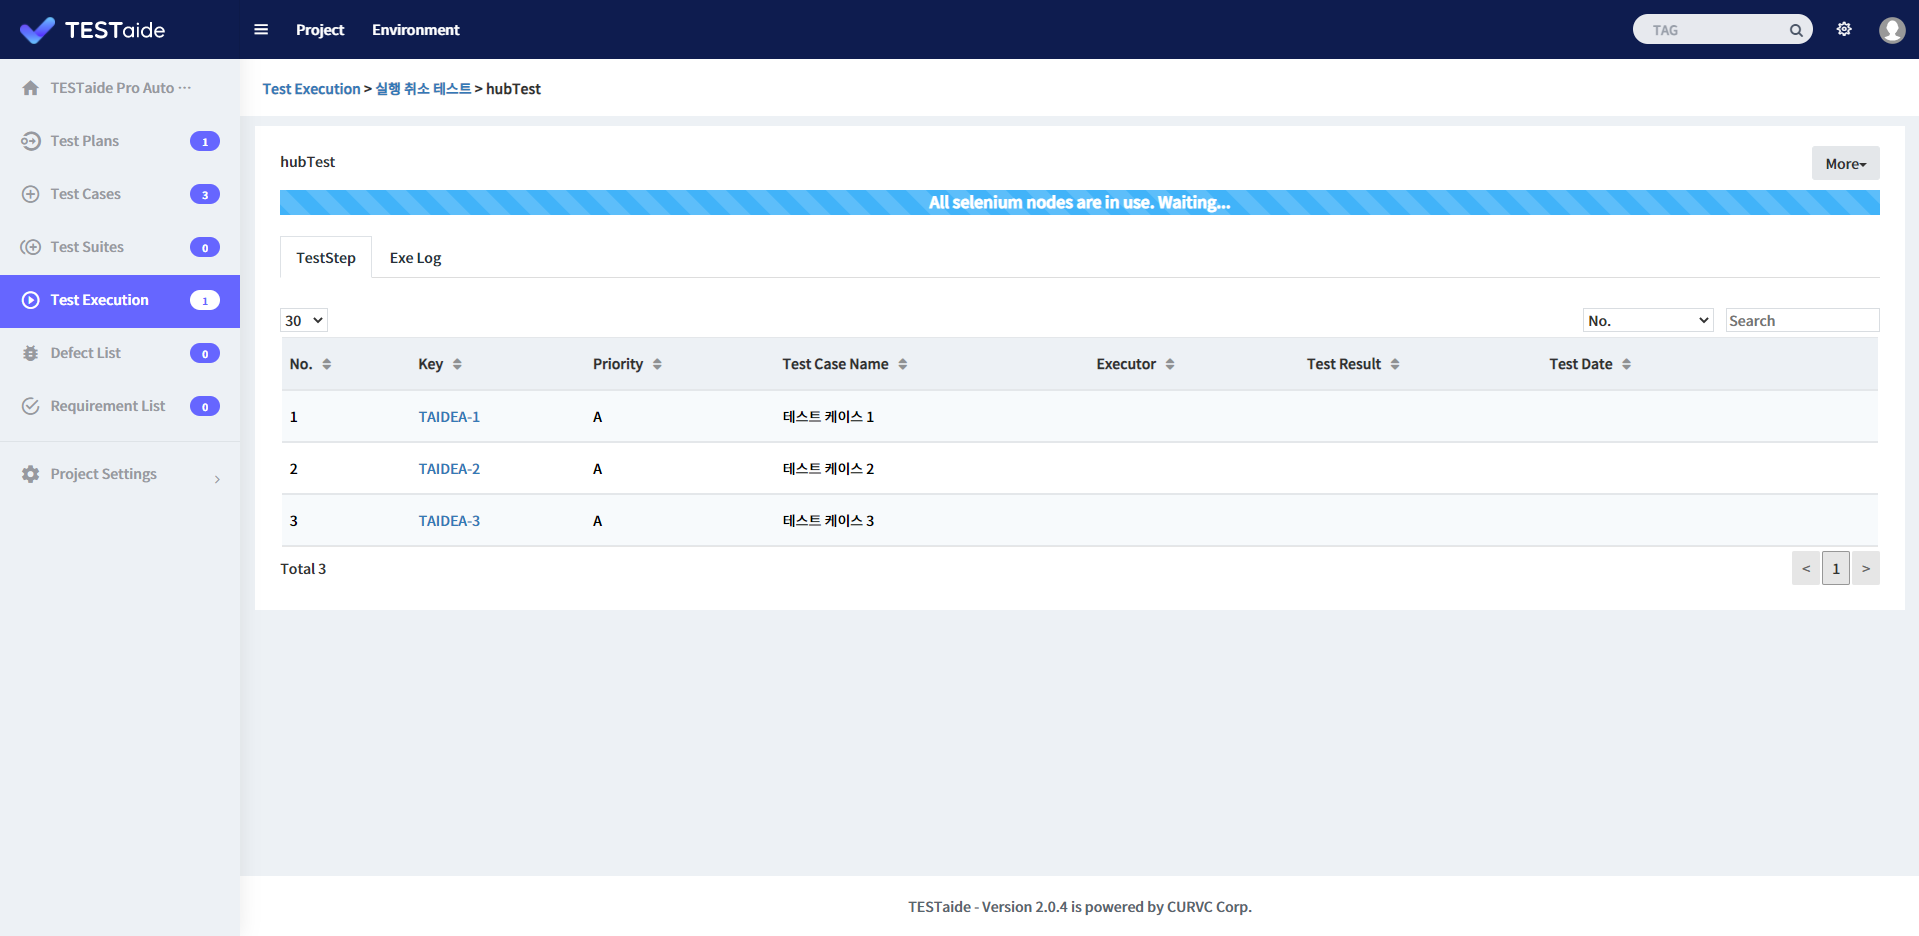
If your environment is a Selenium Hub :
When Selenium Hub is all busy and waiting, the user is notified.
For the manual type of test plan, enter the results manually.
For the auto type of test plan, the results are entered automatically.
To execution test,
In TESTaide home, select a project that you want to execute.
Select the 'Test Execution' menu on the left sidebar.
In the test execution page, select a test plan that you want to execute from the list.
In the regression list panel below, click the ‘Run’ button.
Cancel an Execution
To cancel an execution,
In TESTaide home, select a project that you want to execute.
Select the ‘Test Execution’ menu on the left sidebar.
In the test execution page, select a test plan that you want to execute from the list.
In the regression list panel below, click the ‘Run’ button.
You can see how the ‘Run’ icon in the middle of the run changes to the ‘Stop’ icon when the run is in progress.
Click the ‘Stop’ icon to confirm the cancel pop-up window, click the ‘Yes’ button to complete the cancellation.
Test Execution Result
For the manual type of test plan
As the test is in progress, the screen enters the test case details and result input screen.
To enter the execution result:
In test step list panel below, you can enter the result collectively with ALL PASS/ALL FAIL button.
In the test step list table, you can enter the result for each test step with the button in the action column.
After completing the input of the results for each test case, you can move to the next test case with the 'Next' button on the bottom right.
For the auto type of test plan
As the test is in progress, the screen enters the execution progress screen.
To enter the execution result:
When the test process is complete, select the test case you want to check from the test case list.
In test step list panel below, you can enter the result collectively with ALL PASS/ALL FAIL button.
In the test step list table, you can enter the result for each test step with the button in the action column.
After completing the input of the results for each test case, you can move to the next test case with the 'Next' button on the bottom right.
Execution Result : PASS
The execution result of the test case becomes PASS only when the result of all test steps or test scripts included in the test case is PASS.
Execution Result : FAIL
If any of the results of the test step or script included in the test case is FAIL, the execution result of the test case becomes FAIL.
If the execution result is FAIL, a button to add a defect is exposed.
you can create a bug issue in connected Jira project.
For more information about creating a bug issue in the Jira project, refer to Register Defects As Jira Issue.