This document provides information on how to set up e-mail notifications for the TESTaide application.
In order to proceed with notification settings, e-mail settings must be configured.
E-Mail Notification Settings
To set up mail notification:
Click the '⚙ Settings' button in the header.
Select the ‘E-Mail Notifications’ menu on the sidebar.
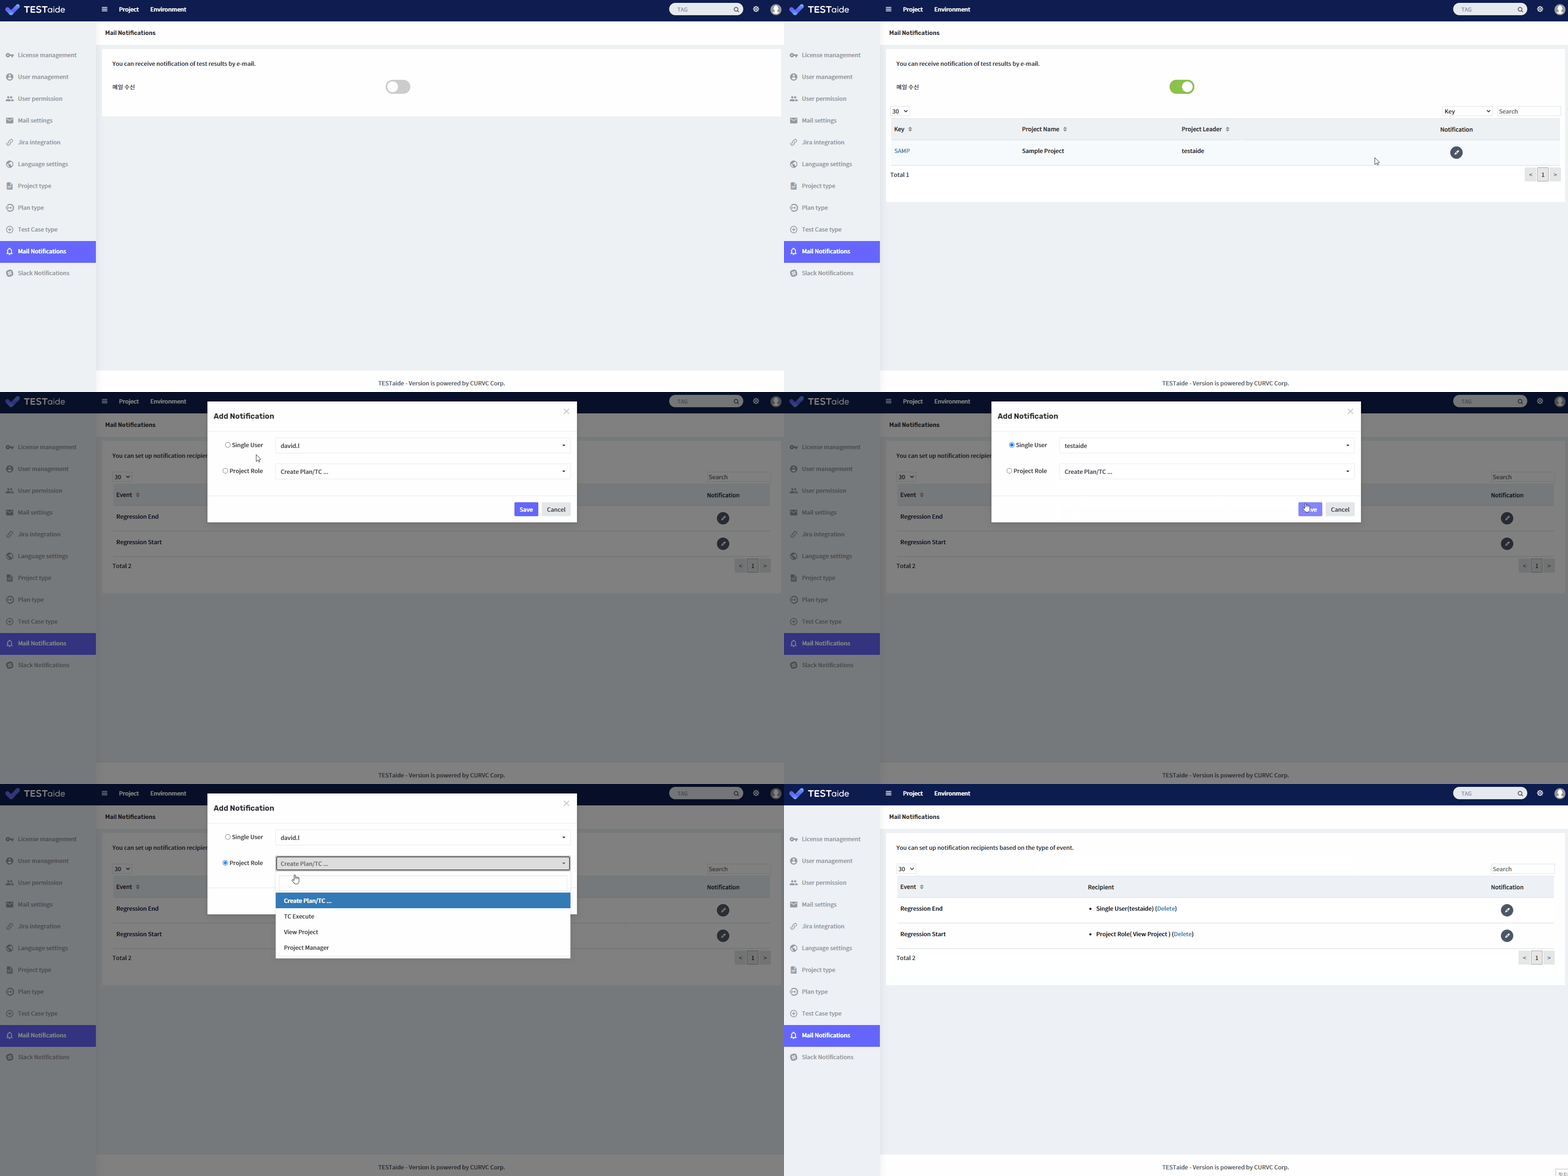
On the Mail Notification Settings page, turn the switch on to receive e-mail notification.
Add Recipient
To add a recipient:
Click the '⚙ Settings' button in the header.
Select the ‘E-Mail Notifications’ menu on the sidebar.
From the list of projects, select the project for which you want to set up e-mail notification.
Add recipients (Single user, Project role) based on the event type (Regress run, Regress End, Regress Fail).
Depending on the event type you set up above, you may receive e-mail notifications.
Delete Recipient
There are two ways to remove a e-mail notifications for a recipient:
Delete e-mail notifications of entire project for a recipient
Click the '⚙ Settings' button in the header.
Select the ‘E-Mail Notifications’ menu on the sidebar.
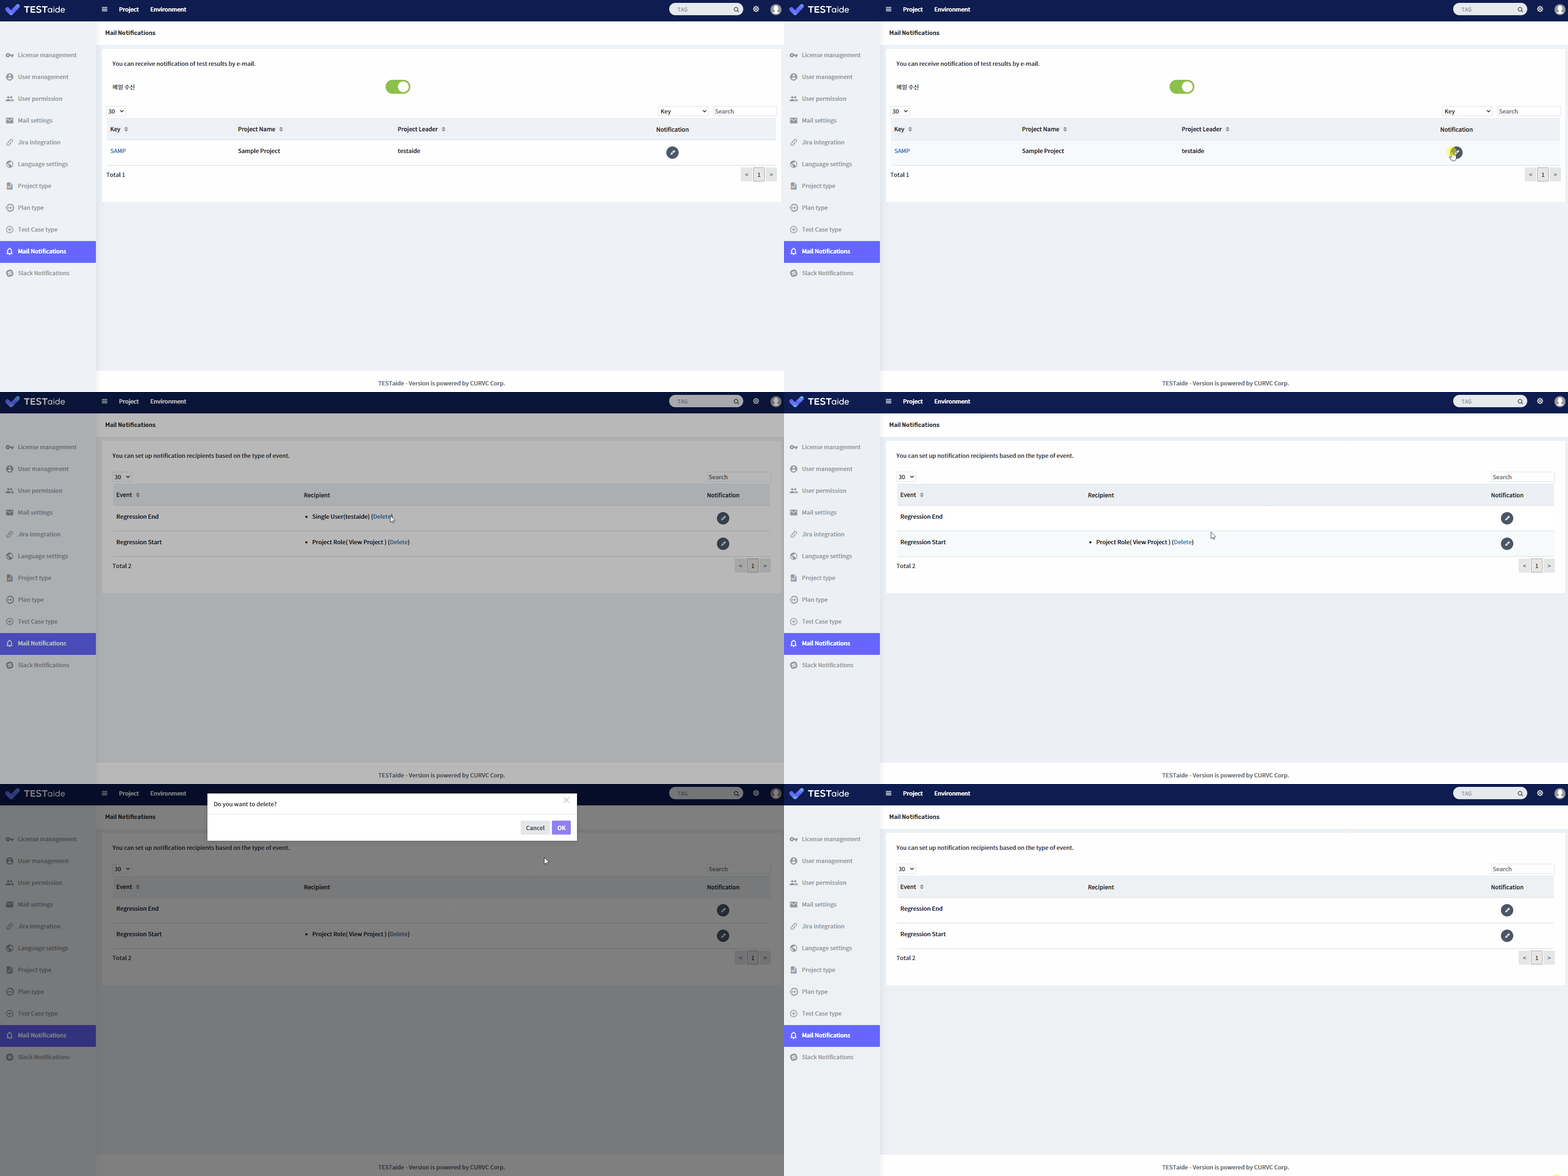
From the list of projects, click the Edit button for the project which you want to delete an e-mail notification recipient.
Click the 'Delete' option beside the recipient for the event type you want to remove notifications for.
NOTE: This removes e-mail notifications from ALL test plans of the project for that recipient.
Delete e-mail notifications of individual test plans for a recipient
In TESTaide home, select the project from which you want to delete an e-mail notification recipient.
Select the ‘Project Settings’ menu on the left sidebar and select ‘E-Mail Notifications’ Settings from the submenu.
From the list of test plans, select the test plan from which you want to delete an e-mail notification recipient.
Click ‘Delete’ besides the recipient(Single user, Project role) you want to delete according to the event type(Regress run, Regress End, Regress Fail).
When the deletion confirmation pop-up window appears, click the ‘OK’ button to complete the deletion.

