This document provides information on how to set up slack notification for the TESTaide application.
To link Slack and TESTaide:
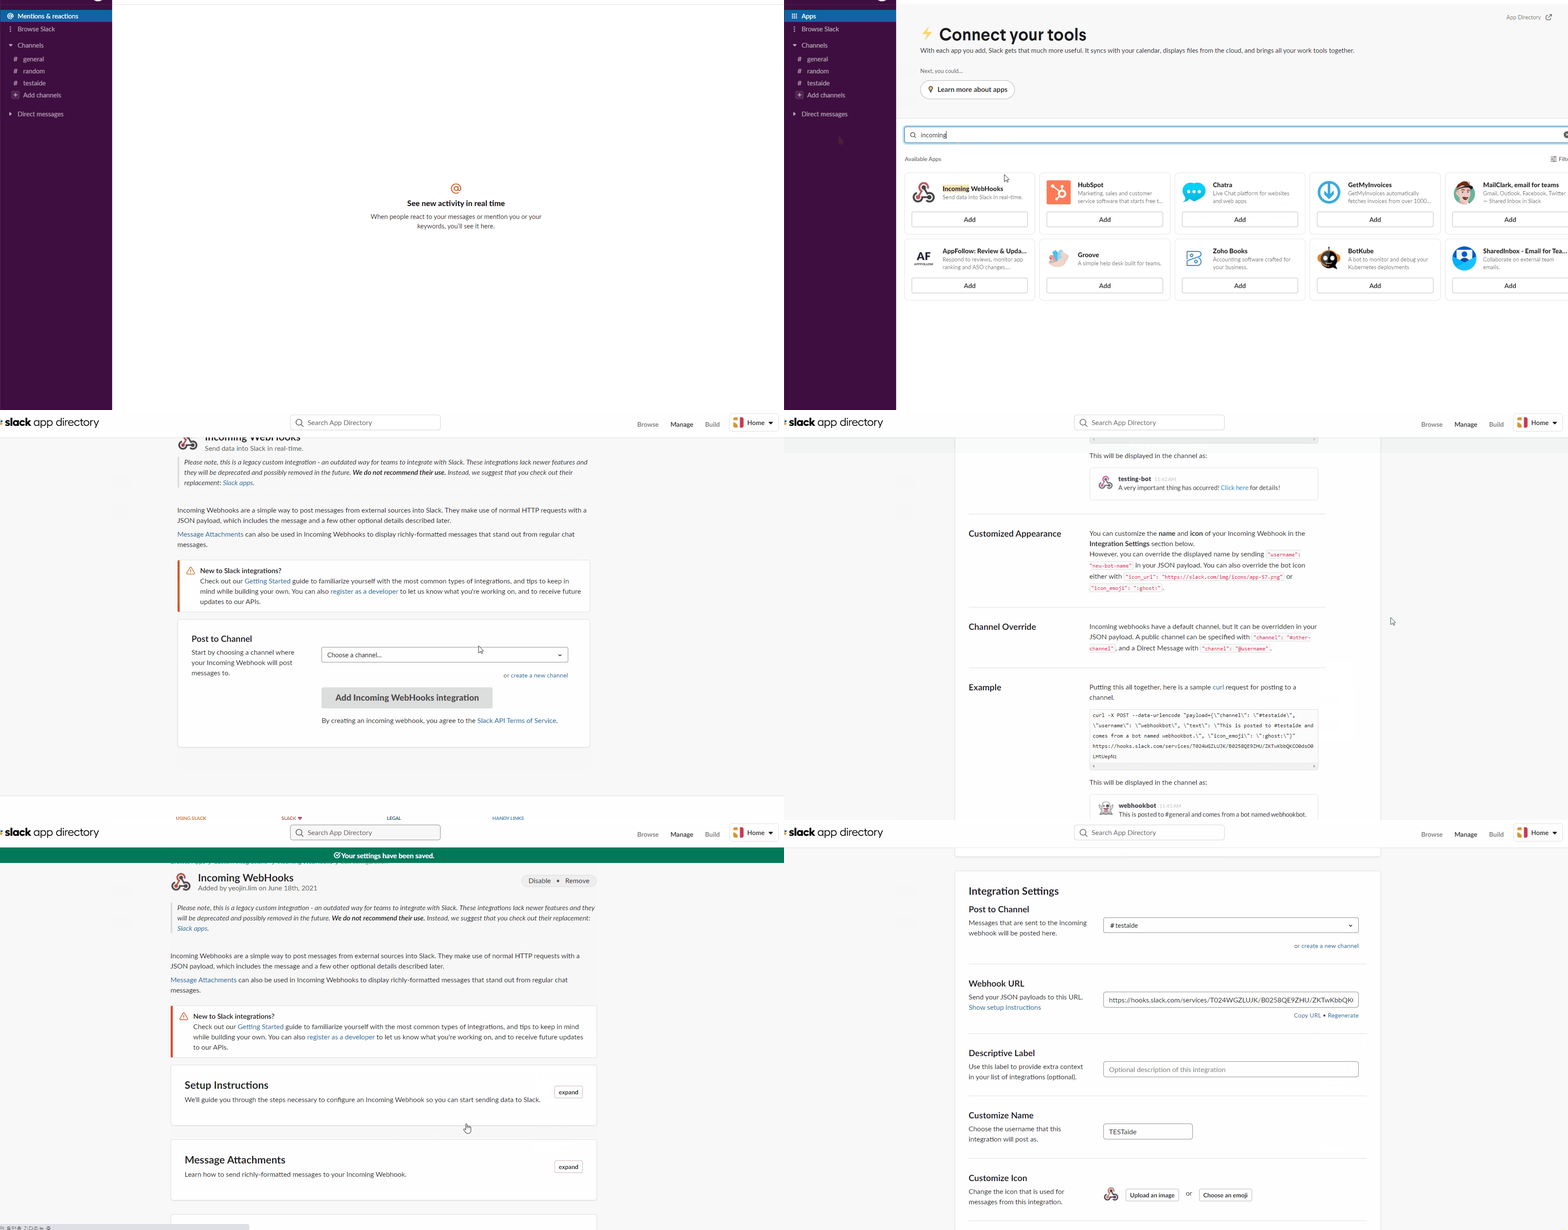
Click ‘More’ in the left sidebar of Slack and select ‘Apps’.
Search for ‘Incoming WebHooks’ in the search bar and click the Add button.
On the Settings page, select the channel you want to receive TESTaide notifications from, enter a channel name and save.
Copy the WebHook URL and follow the procedure below.

To set up Slack notifications:
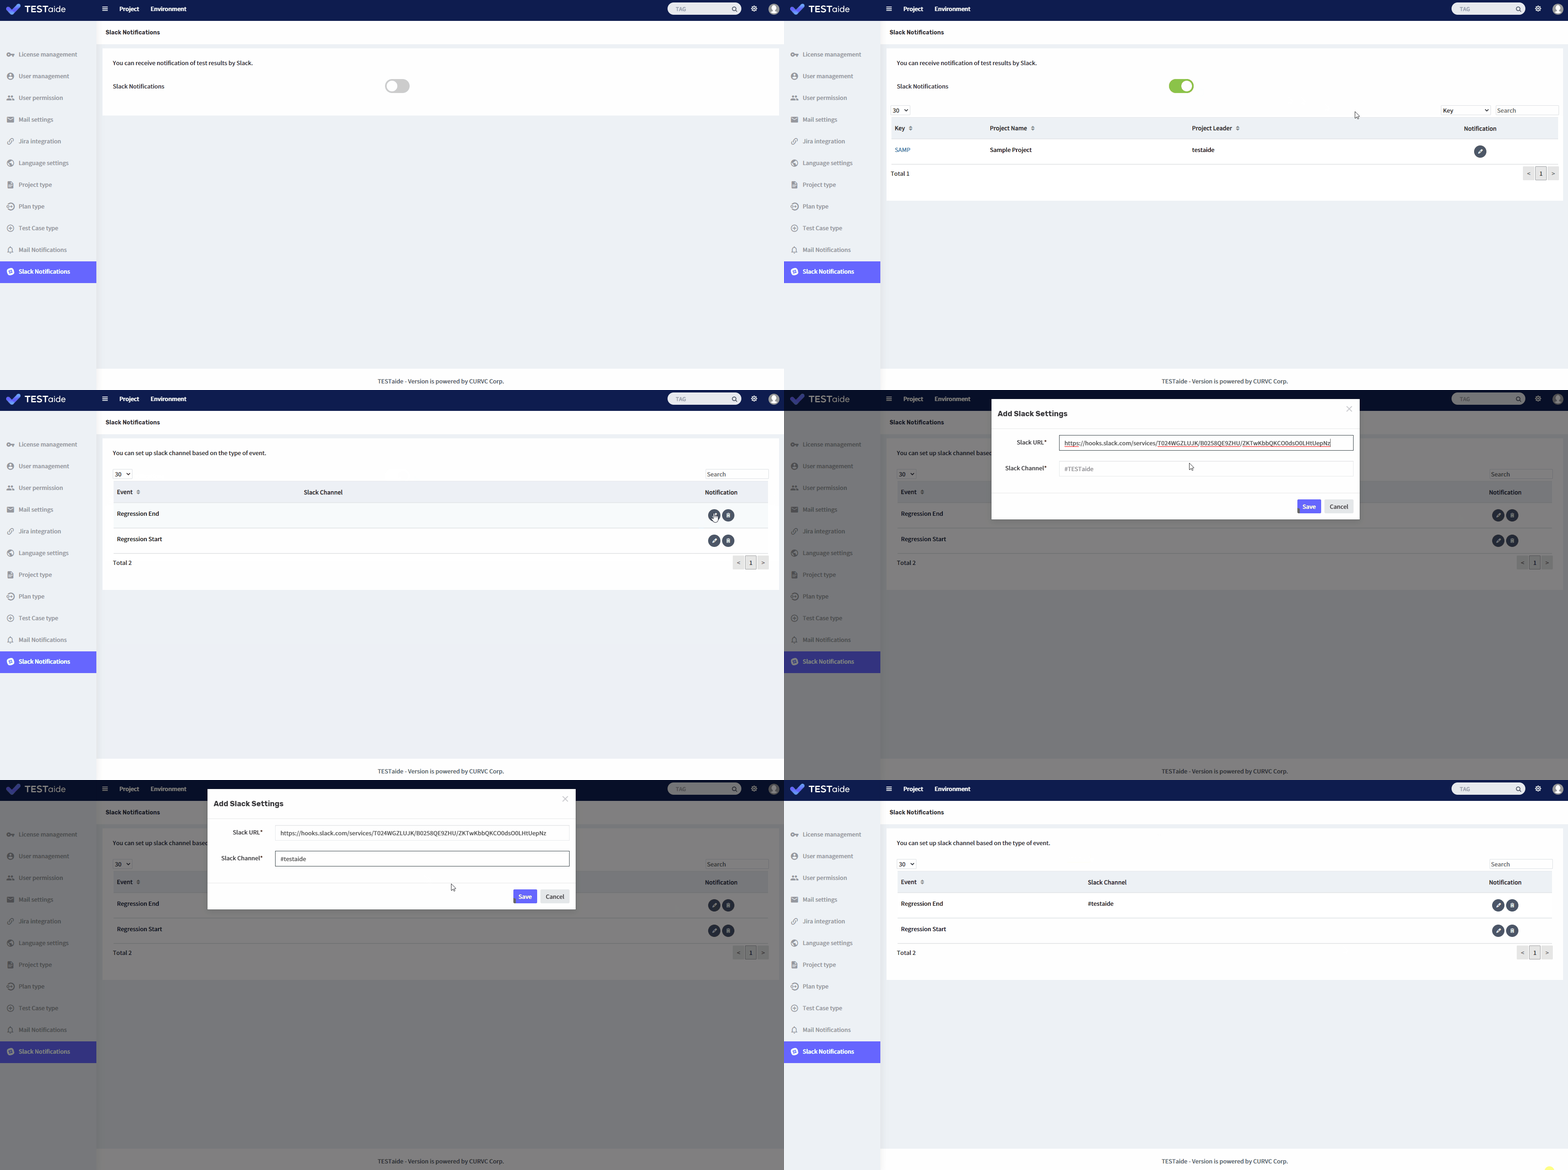
Click the '⚙ Settings' button in the header.
Select the ‘Slack Notifications’ menu on the sidebar.
On the Slack Notification Settings page, turn the switch on to receive Slack notifications.
There are two ways to add a Slack channel to receiving notifications:
Click the '⚙ Settings' button in the header.
Select the ‘Slack Notifications’ menu on the sidebar.
From the list of projects, click the ‘Edit’ icon in the ‘Notification’ column for the project you want to set up Slack notifications for.
Click the ‘Edit’ icon in the 'Notification' column for the event (Regression Start, Fail, or End) you want to add notifications from.
Enter the Slack URL and Slack channel and click ‘Save’ to add the channel to receive notifications.

In TESTaide home, select the project for which you want to add Slack notifications.
Select the ‘Project Settings’ menu on the left sidebar and select ‘Slack Notifications’ Settings from the submenu.
From the list of test plans, select the test plan for which you want to add Slack notifications.
Click the ‘Edit’ icon in the 'Notification' column for the event (Regression Start, Fail, or End) you want to add notifications from.
Enter the Slack URL and Slack channel and click ‘Save’ to add the channel to receive notifications.
There are two ways to remove a Slack channel from receiving notifications:
Click the '⚙ Settings' button in the header.
Select the ‘Slack Notifications’ menu on the sidebar.
From the list of projects, select the project for which you want to delete slack notification.
Click the ‘Delete’ icon on the right side of the Slack channel you want to edit according to the event type(Regress run, Regress End, Regress Fail).
When the deletion confirmation pop-up window appears, click the ‘OK’ button to complete the deletion.
NOTE: This removes Slack notifications from ALL test plans of the project for that recipient. |
In TESTaide home, select the project from which you want to delete Slack notifications.
Select the ‘Project Settings’ menu on the left sidebar and select ‘Slack Notifications’ Settings from the submenu.
From the list of test plans, select the test plan from which you want to delete Slack notifications.
Click ‘Delete’ besides the recipient(Single user, Project role) you want to delete according to the event type(Regress run, Regress End, Regress Fail).
When the deletion confirmation pop-up window appears, click the ‘OK’ button to complete the deletion.