This document provides how to start TESTaide simply.
| 목차 | ||||
|---|---|---|---|---|
|
✅ Step0. Prerequisite
License Request : https://testaide.io/
...
In Header, click the Environment menu and click the Create Environment button.
Select the project type as Server, enter the required fields and click the Save button.
Type* : Server
Platform*
Browser*
Browser Path*
Windows : C:/Program Files/Google/Chrome/Application/chrome.exe
Linux : /opt/google/chrome/chrome
Driver File Path*
Environment Name*
...
✅ Step4. Create Project
In Header, click the Project menu and click the Create Project button.
Enter the required fields and click the Save button.
Project Type*
Project Key*
Project Name*
Environment Name* : Select the name of the environment you created in step3.
Click the project you created.
...
Select the test plan menu in the side bar and click the Create Test Plan button.
Select the plan type as Server, enter the required fields and click the Save button.
Environment*
Test Plan Type* : Auto
Test Plan Name*
...
✅ Step6. Create Test Case
Select the test case menu in the side bar and click the Create Test Case button.
In the test case creation page, enter the test case name and select the test case type as Auto and click the Test Case Save button.
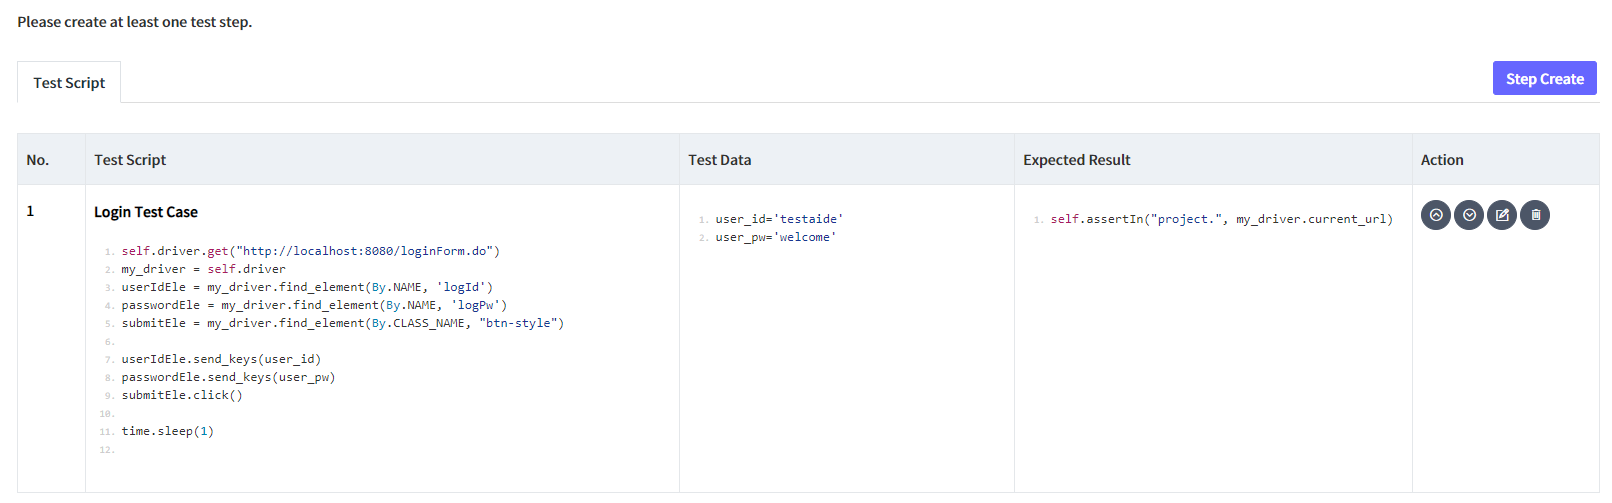
In the ‘Test Script’ pop-up window, enter the Title, Test Script*, Test Data and click the Save button.
Scripts must be described in accordance with Python syntax, and method names for each test case are not written.
If you write a user_id='testaide' in Test Data , it can be used as a variable in the script.
Test Script Example (Login to TESTaide in localhost)
코드 블럭 language py self.driver.get("http://localhost:8080/loginForm.do") my_driver = self.driver userIdEle = my_driver.find_element(By.NAME, 'logId') passwordEle = my_driver.find_element(By.NAME, 'logPw') submitEle = my_driver.find_element(By.CLASS_NAME, "btn-style") userIdEle.send_keys(user_id) passwordEle.send_keys(user_pw) submitEle.click() time.sleep(1)Test Data Example
코드 블럭 user_id='testaide' user_pw='welcome'
Expected Result Example
코드 블럭 language py self.assertIn("project.", my_driver.current_url)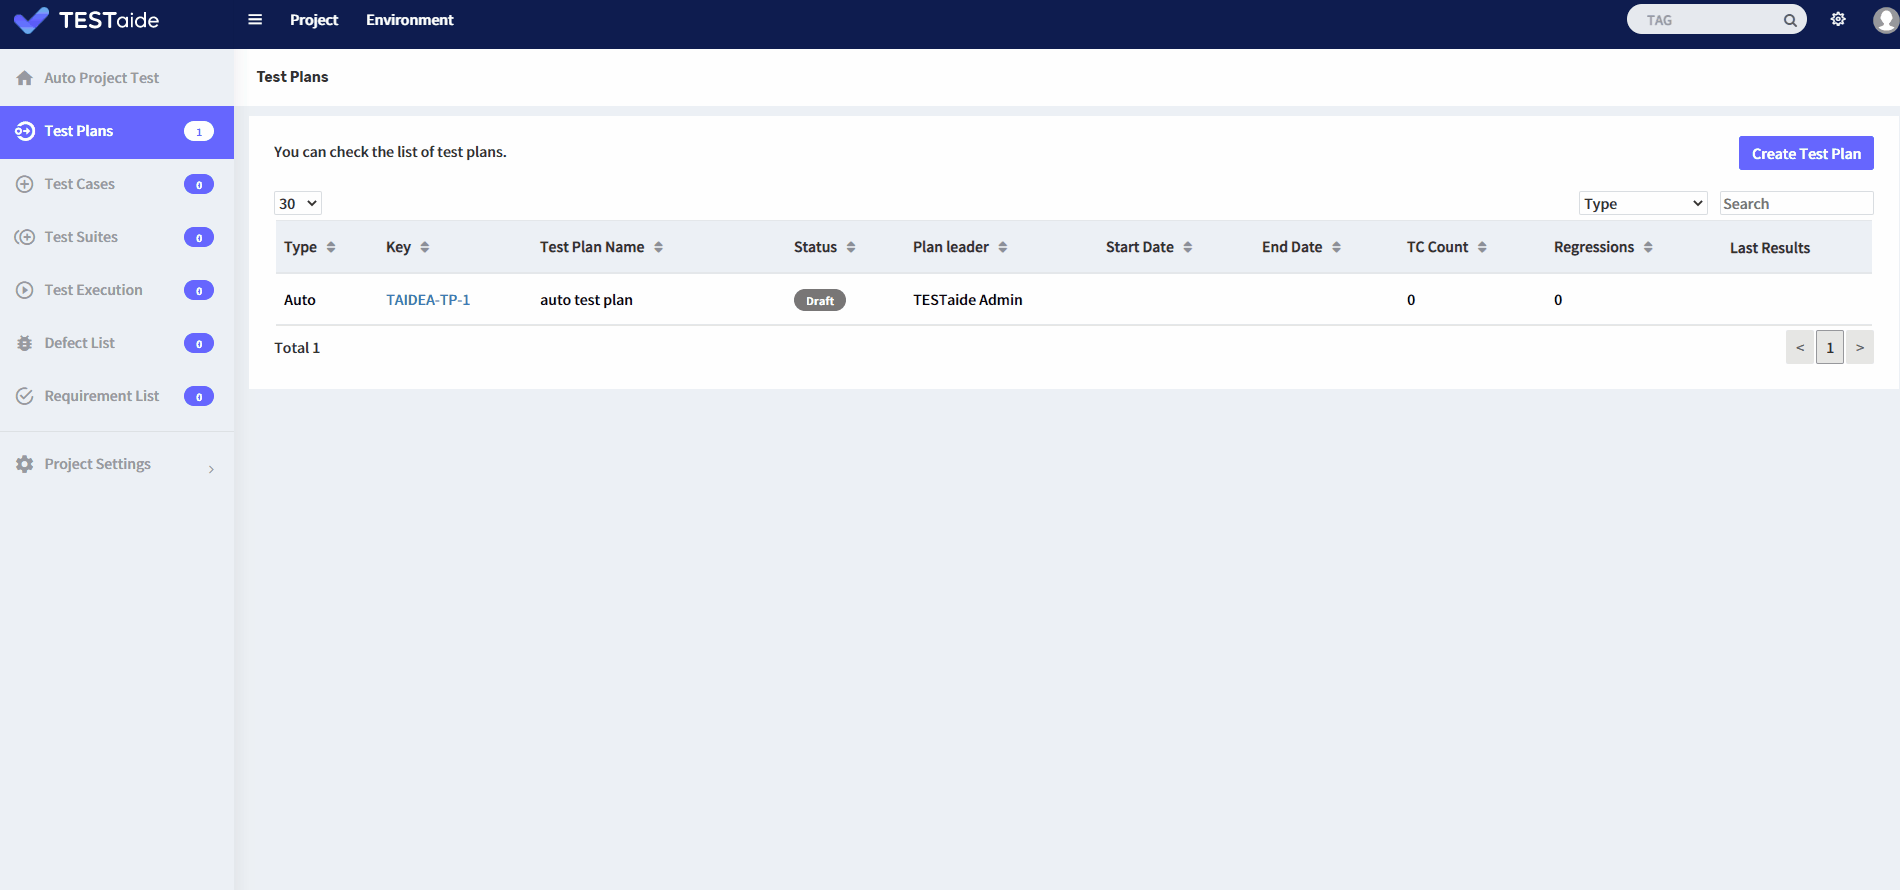
TESTaide login test case example
The python script that is completed when executing the test
코드 블럭 language py # -*- coding: utf-8 -*- import unittest import time import datetime import random import sys from selenium import webdriver from selenium.webdriver.common.by import By from selenium.webdriver.support.select import Select from selenium.webdriver.remote.command import Command from selenium.webdriver.common.keys import Keys from ServerDriverInfo_0 import ServerDriver_0 class Server_1_TAIDEA_1(unittest.TestCase): @classmethod def setUpClass(cls): cls.driver = ServerDriver_0.instance().getDriver() def test_1_Script_Server_1_TAIDEA_1(self): user_id='testaide' user_pw='welcome' self.driver.get("http://localhost:8080/loginForm.do") my_driver = self.driver userIdEle = my_driver.find_element(By.NAME, 'logId') passwordEle = my_driver.find_element(By.NAME, 'logPw') submitEle = my_driver.find_element(By.CLASS_NAME, "btn-style") userIdEle.send_keys(user_id) passwordEle.send_keys(user_pw) submitEle.click() time.sleep(1) self.assertIn("project.", my_driver.current_url)
...
Select the test execution menu in the side bar and select the test plan created in step5.
Click the Add Regression button.
Enter the Regression Title* and click the Save button.
...
✅ Step10. Test Execution
...